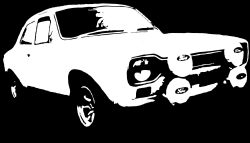
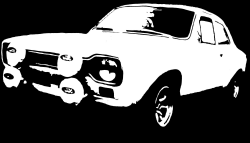
How to Decal an MK1 RS 2000
Follow the step by step instruction on how to decal your RS2000, it'll be worth obtaining a couple of decent tools to have at hand such as:
A decent squeegee large & small, some vinyl sticker applicator available from any sign writing company (many people use diluted washing up liquid) You will also need a sharp knife and scissors.

It is best to degrease the whole of the car to remove any wax that might have been applied using a professional wax remover prior to fitting decals. Methylated spirits will remove grease, wipe the car panels over with meths after you have de-waxed the car.
Starting with the largest panel first, the back wing, offer the transfer to the panel and align with eye, the top of the main decal and the lower edge of the strip should fit between the swage line of the panel. The end point of the decal should be approximately 36 - 38mm from the end of the wing. Mark the decal and edge of the panel to reduce the risk of movement as you move through the side of the car, fitting the decals. Note that the door section is wide one end and this should be obvious when following these instructions.


Follow the same principal through the door and front wing, and remember to mark each decal and panel. Once the decals and panels have been marked, they are now ready to be fitted. Remove the backing paper from the decal and lay flat, spray a fine mist of applicator to the decal and the same to the panel, this will allow you to slide the decal into position, and fit to the marked positions. When the decal is fitted correctly, squeegee out all applicator and leave to dry for about 15 minutes. If you feel confident, you can remove the decal release paper at once, but be sure that you do not lift the strip and/or stretch it. Try to leave sufficient decal on the longer sections such as doors, to contour around the inner side of the panel.


Repeat this through the side of the car and then follow this process for the passenger side of the vehicle.
The bonnet decals come in 3 parts as do the boot decals, it is important to line the front lower decal in the right position, with approximately 30mm between the lower part of the strip to the edge of the bonnet. When fitting the upper decals line by eye and take care that you are fitting the correct side as they are different.

Line each side and ensure that they have approximately 30mm to the point of the decal to the top of the bonnet, and mark all decals and bonnet prior to removal and spraying with applicator. Again, use a small squeegee to remove the applicator between the bonnet and decal and wait for a while prior to attempting to remove release paper. Note that we have fitted the lower decal over the top decals, and that they will need to be trimmed to size one fitted and dry. Pierce the bonnet holes prior to fitting the FORD script.


Remove the boot lock by closing the spring clip that retains the boot lock and all of the letter scripts, clean the area thoroughly with a good wax remover and wipe with meths to degrease the panels fully.
We have laid the bottom edge of the lower strip about 10mm from the lower edge of the boot and left sufficient to overlay around the inside of the boot. Mark the decal and panel and then spray boot panel with applicator and offer decal to panel, when the decal is aligned to the markingsz, squeegee the applicator fluid out. Wait for things to dry and then remove backing paper. The last items to fit are the corner decals, simply do this by eye and remember to mark the decal and panel once again. Pierce the boot decal and take care when refitting the Escort and FORD scripts back to the panel.


Finally, it may be necessary to pin air bubbles out from between the decal and panel, leave the decals a few days before you attempt this as the air could evaporate.
|